No products in the cart.

Hello Family,
The information below may seem like a lot, but it is in depth information provided by our website host so that you can get the best out of your experience adding and deleting products. These are detailed and step by step instructions that help you navigate our site with ease.
Please do not forget that we are always around for any questions you may have.
Adding a product
Before adding your first product, let’s get familiar with how product categories, tags, and attributes work.
Product Categories
Product categories and tags work in much the same way as normal categories and tags you have when writing posts in WordPress. They can be created, edited, and selected at any time. This can be done when you first create a product or come back and edit it or the category/tag specifically.
Attributes
These can be added per product, or you can set up global attributes for the entire store to use (e.g., in layered navigation).
To learn more, see: Managing Product Categories, Tags and Attributes
Product Types
With attributes and categories set up and stock management configured, we can begin adding products. When adding a product, the first thing to decide is what type of product it is.
- Simple – covers the vast majority of any products you may sell. Simple products are shipped and have no options. For example, a book.
- Variable – a product with variations, each of which may have a different SKU, price, stock option, etc. For example, a t-shirt available in different colors and/or sizes.
- Grouped – a collection of related products that can be purchased individually and only consist of simple products. For example, a set of six drinking glasses.
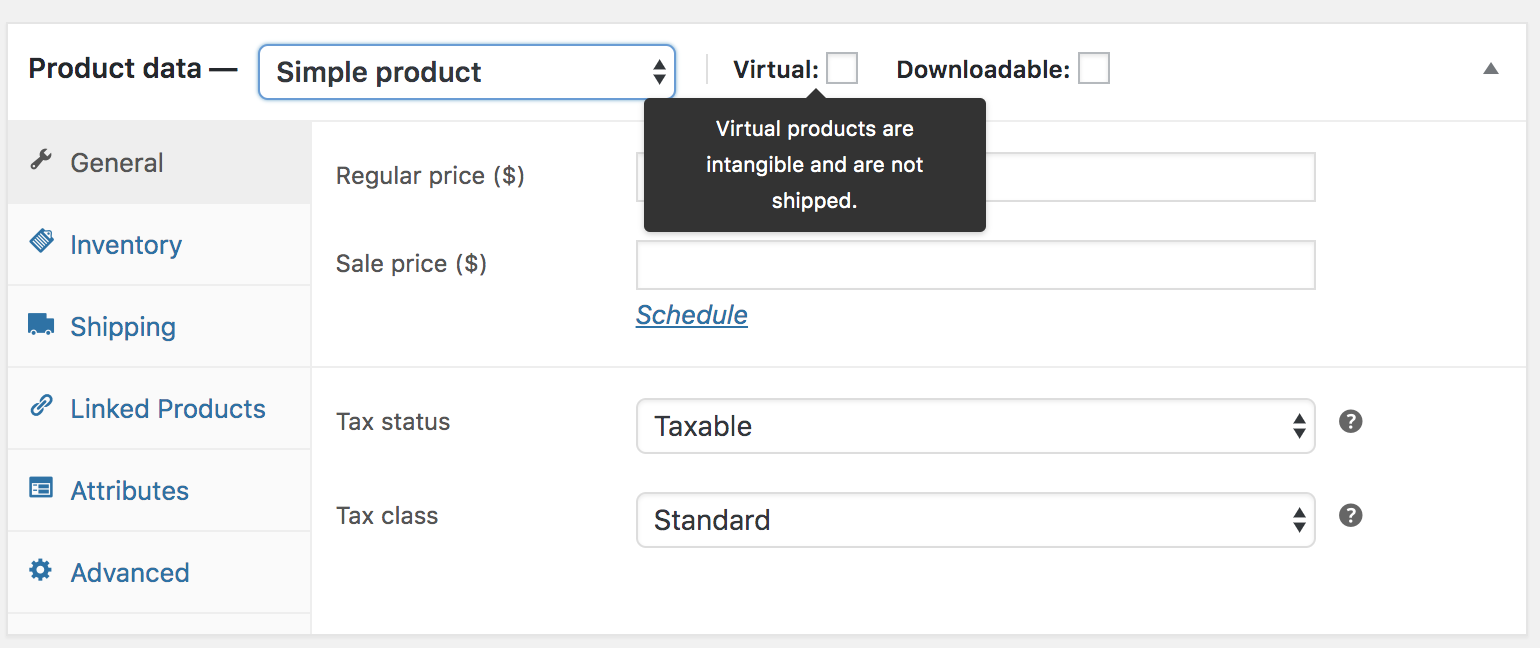
- Virtual – one that doesn’t require shipping. For example, a service. Enabling this, disables all shipping related fields such as shipping dimensions. A virtual product will also not trigger the shipping calculator in cart and checkout.
- Downloadable – activates additional fields where you can provide a downloadable file. After a successful purchase, customers are given a downloadable file as a link in the order notification email. This is suitable, for example, for a digital album, PDF magazine, or photo.
- External or Affiliate – one that you list and describe on your website but is sold elsewhere.
Adding a simple product
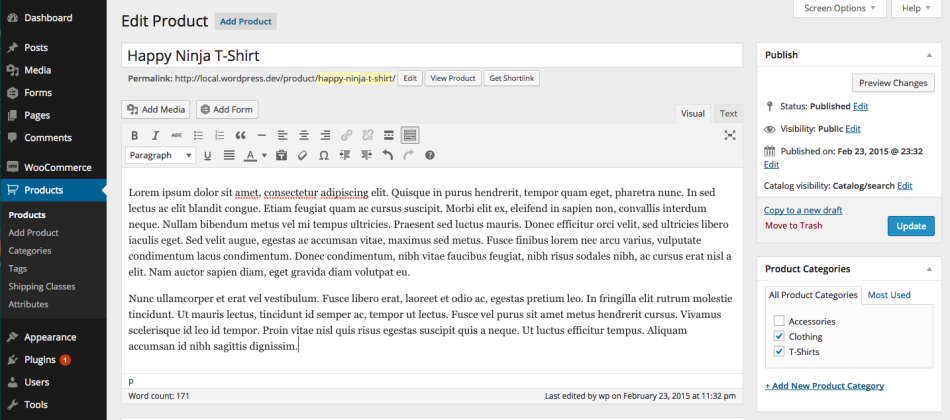
Adding a Simple product is similar to writing a post in WordPress.
- Go to Products > Add Product. You then have a familiar interface and should immediately feel at home.
- Enter a product Title and Description.
- Go to the Product Data panel, and select downloadable (digital) or virtual (service) if applicable.
Note: Virtual products don’t require shipping — an order with virtual products won’t calculate shipping costs.
Product data
The Product Data meta box is where the majority of important data is added for your products.
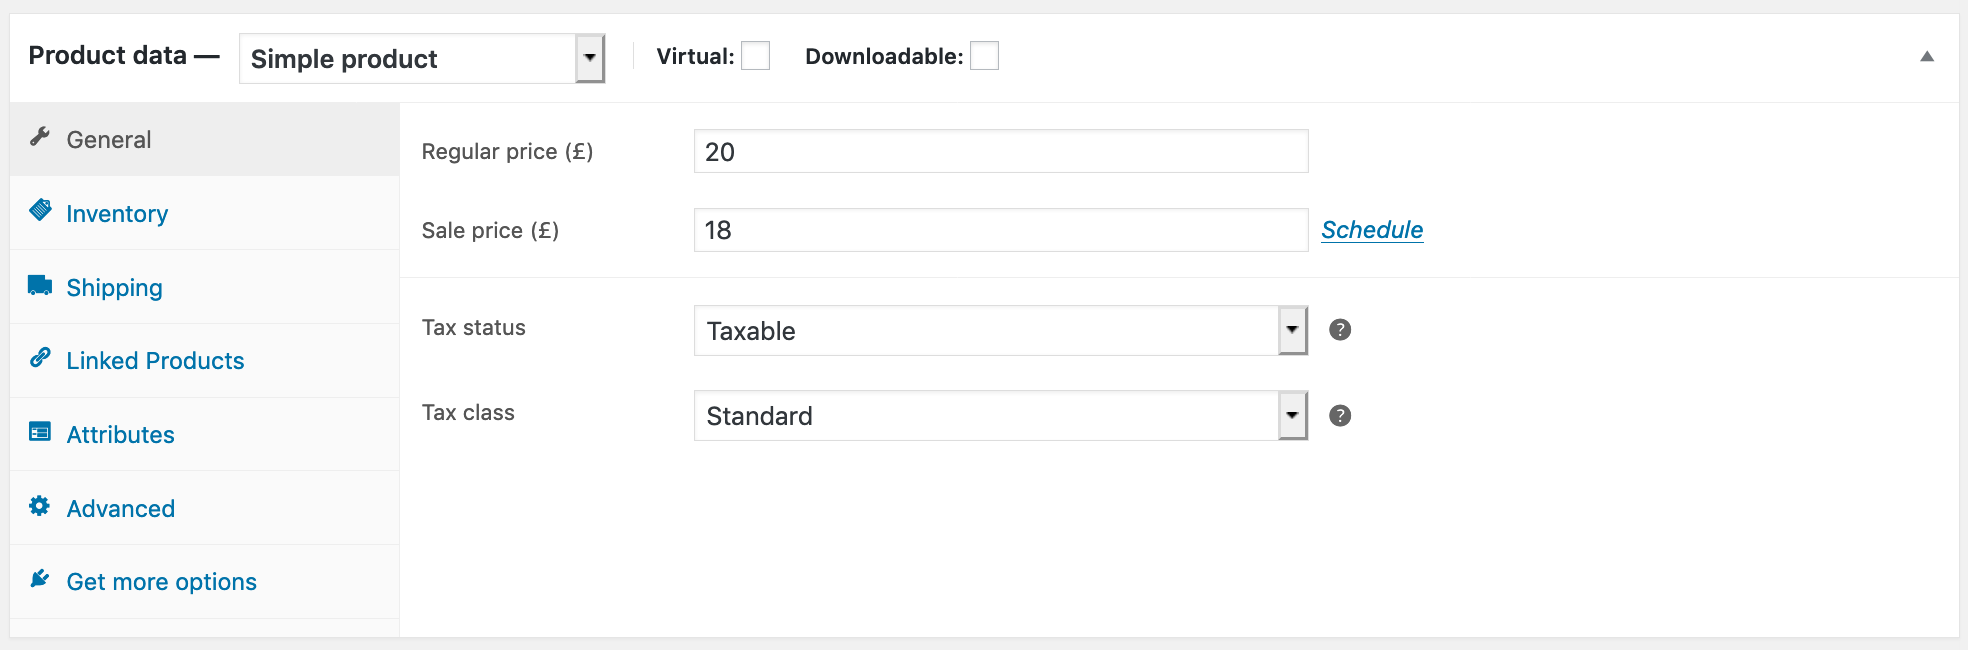
General section
- Price
- Regular Price – Item’s normal/regular price
- Sale Price – Item’s discounted price that can then be scheduled for certain date ranges. The sale expires at 11:59pm of the specified end date
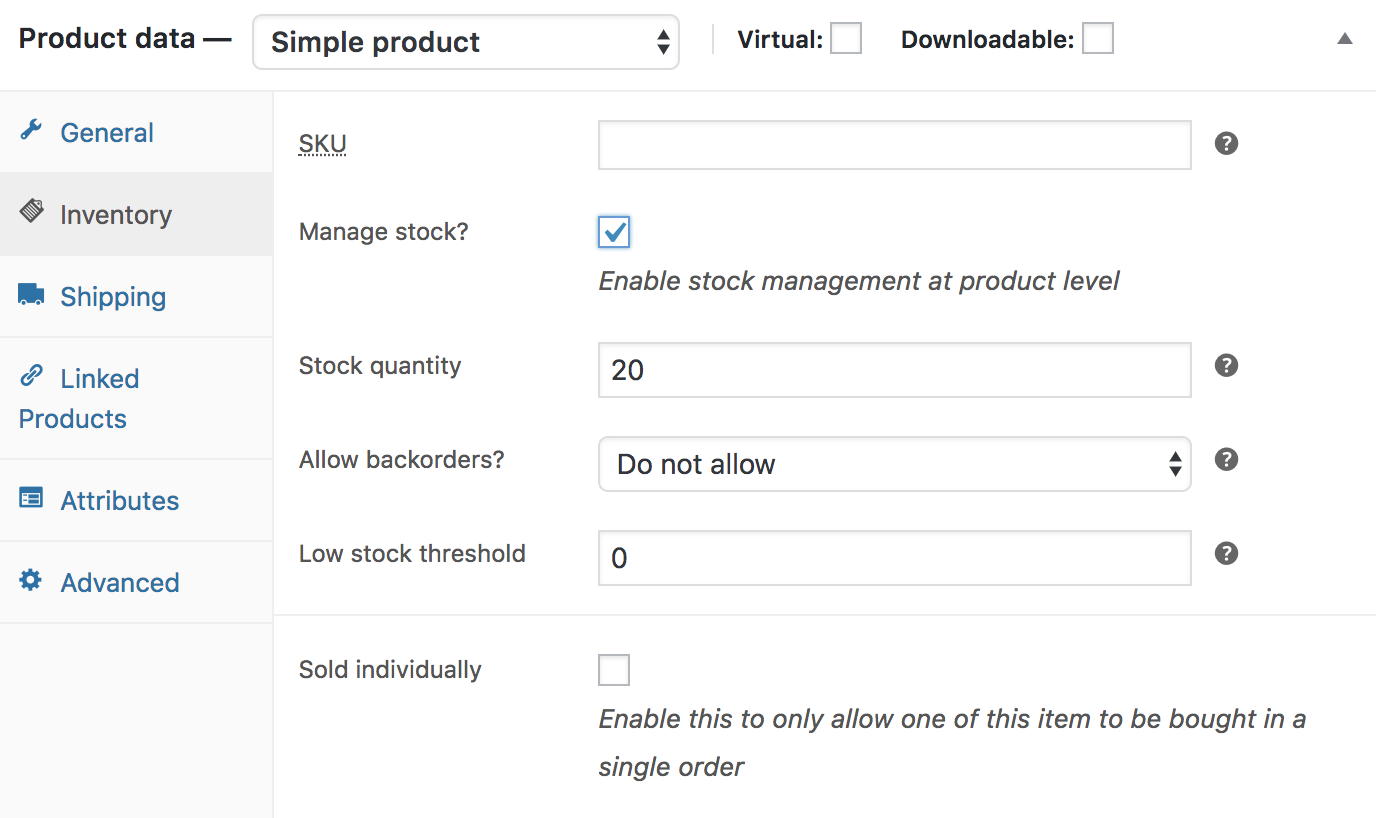
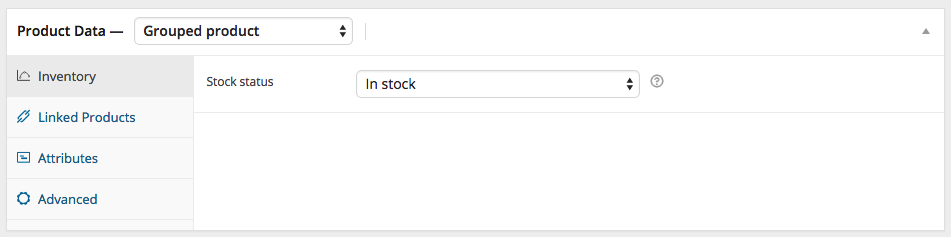
Inventory section
The inventory section allows you to manage stock for the product individually and define whether to allow back orders and more. It enables you to sell products and allow customers to add them to the cart to buy.
You are responsible for updating the Stock Status.
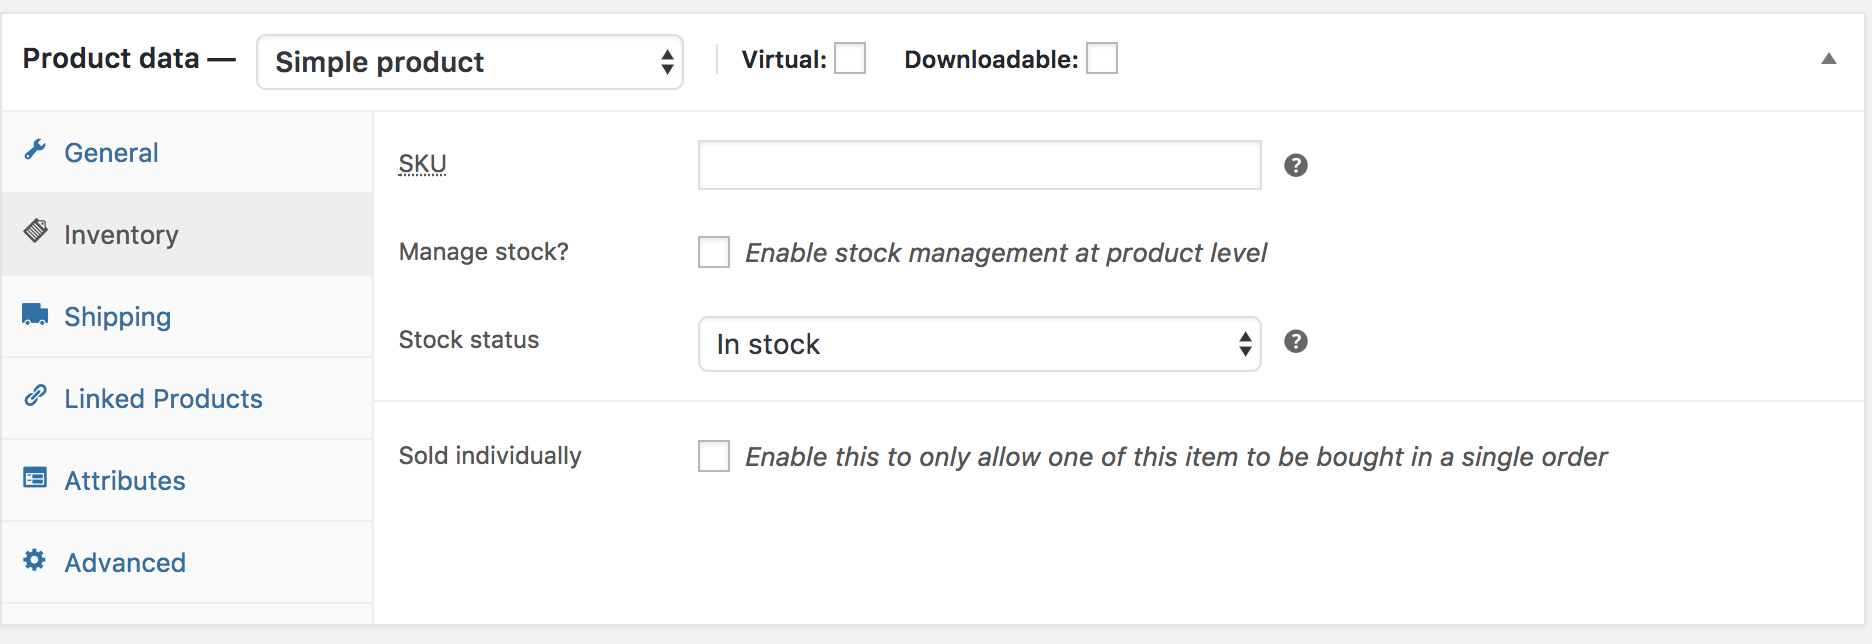
- Enter the Stock Quantity, and it will auto-update Stock Status as Stock, Out of Stock or On Back order.
- Select whether to Allow Back orders.
- Low stock threshold – Enter a number upon which you are notified.
- Tick the Sold Individually box to limit the product to one per order.
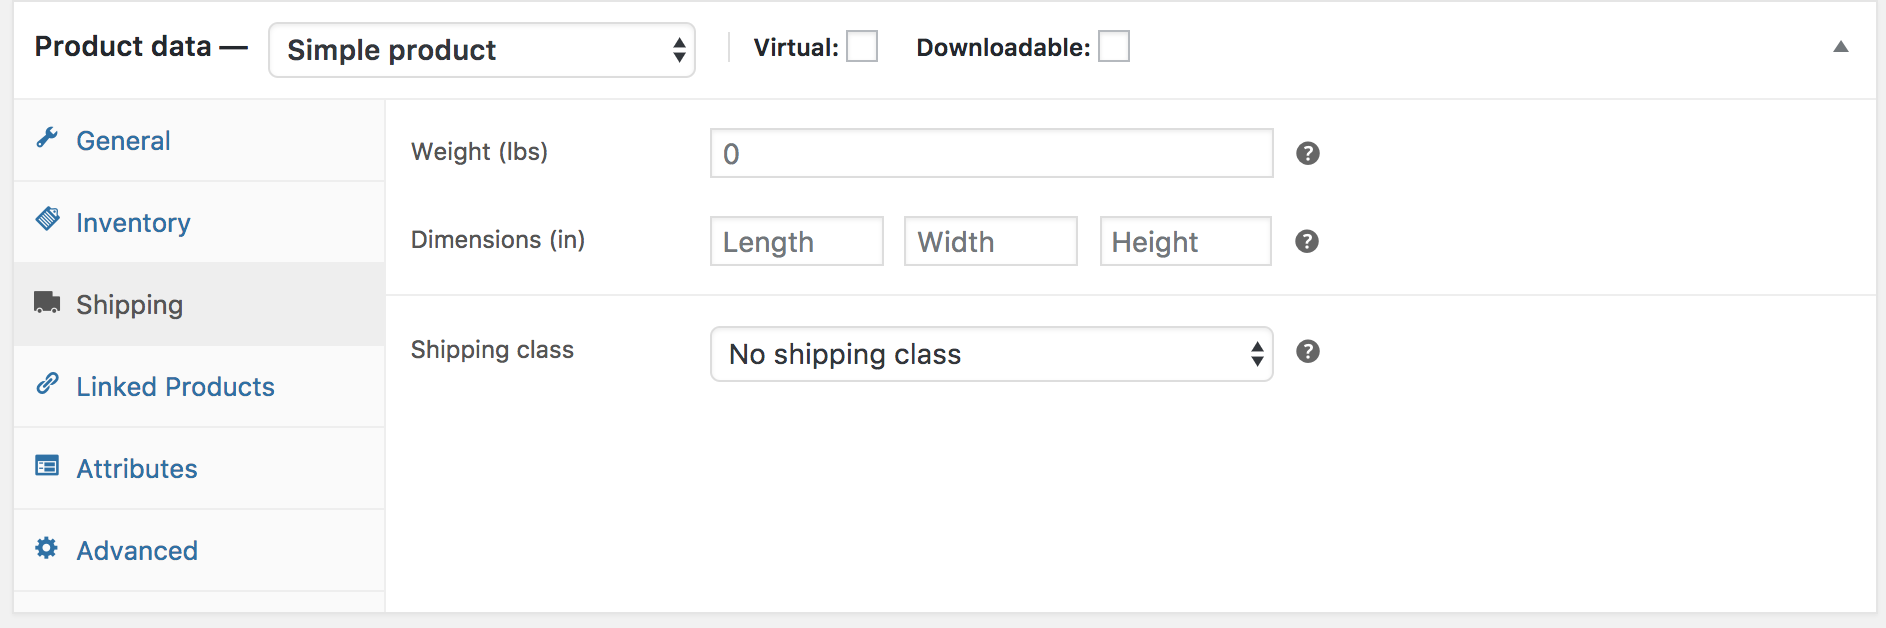
Shipping section
- Weight – Weight of the item.
- Dimensions – Length, width and height for the item.
- Shipping Class – Shipping classes are used by certain shipping methods to group similar products.
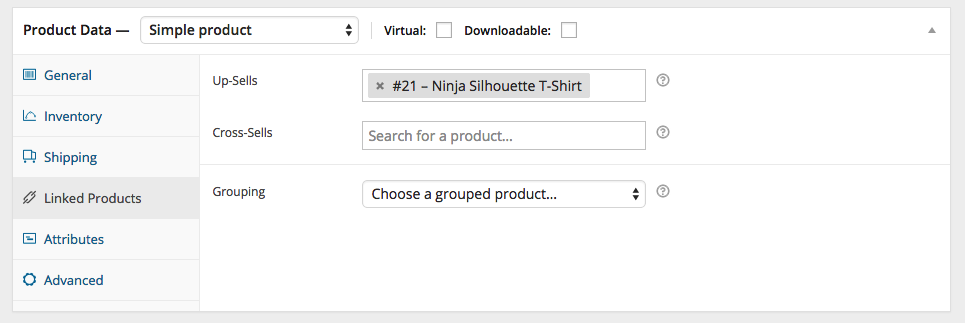
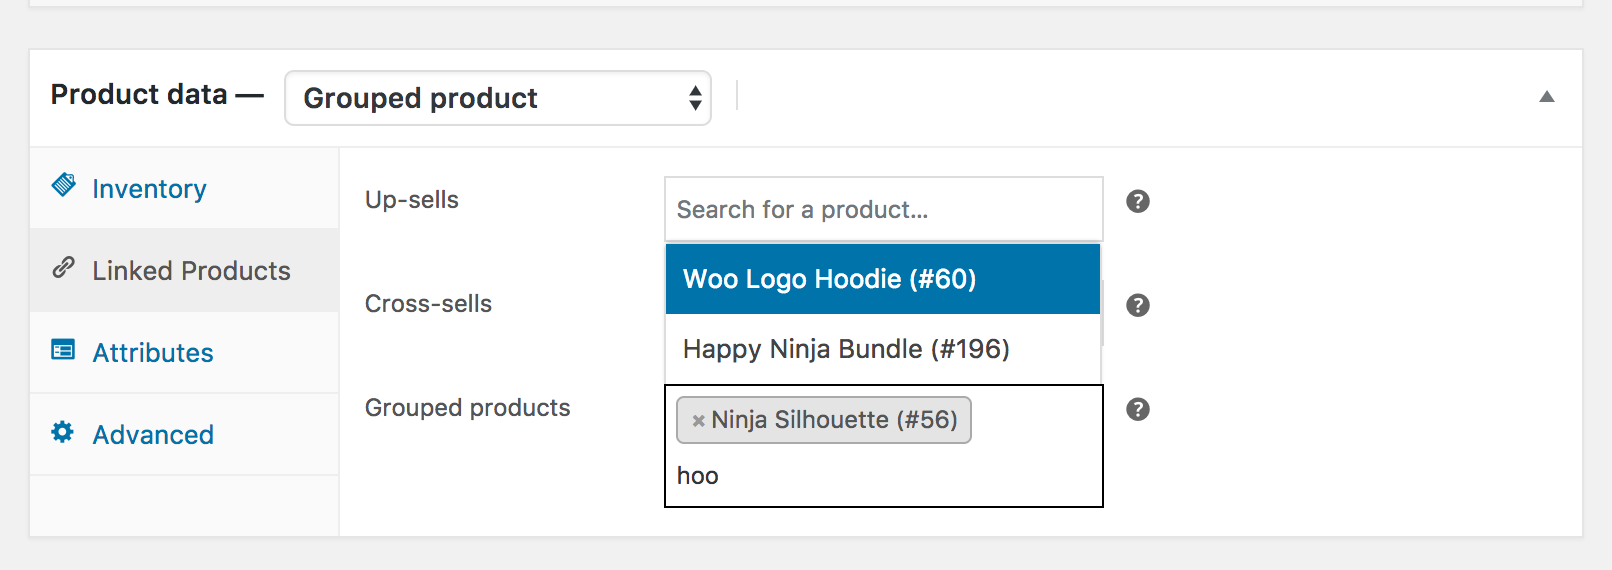
Linked Products section
Using up-sells and cross-sells, you can cross promote your products. They can be added by searching for a particular product and selecting the product from the drop down list:
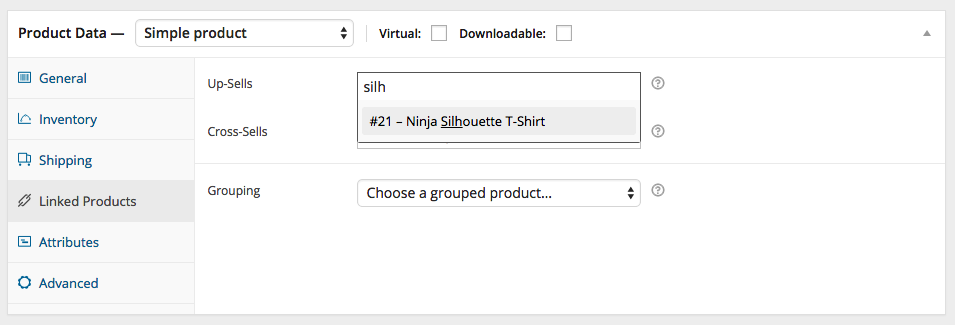
After adding, they are listed in the input field:
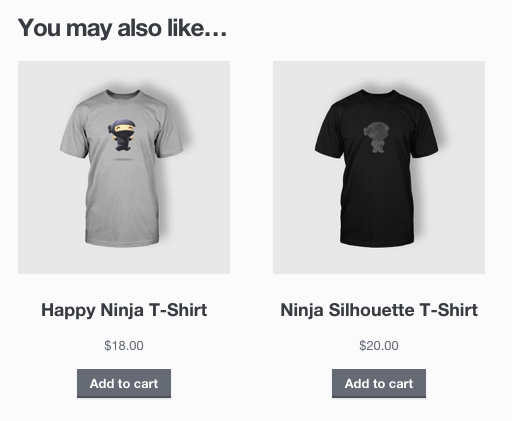
Up-sells are displayed on the product details page. These are products that you may wish to encourage users to upgrade, based on the product they are currently viewing. For example, if the user is viewing the coffee product listing page, you may want to display tea kettles on that same page as an up-sell.
Cross-sells are products that are displayed with the cart and related to the user’s cart contents. As an example, if the user adds a Nintendo DS to their cart, you may want to suggest they purchase a spare stylus when they arrive at the cart page.
Grouping – Used to make a product part of a grouped product.
Attributes section
On the Attributes tab, you can assign details to a product. You will see a select box containing global attribute sets you created (e.g., platform).
Once you have chosen an attribute from the select box, click add and apply the terms attached to that attribute (e.g., Nintendo DS) to the product. You can hide the attribute on the frontend by leaving the Visible checkbox unchecked.
Custom attributes can also be applied by choosing Custom product attribute from the select box. These are added at the product level and won’t be available in layered navigation or other products.
Advanced section
- Purchase note – Enter an optional note to send the customer after they purchase the product.
- Menu order – Custom ordering position for this item.
- Enable Reviews – Enable/Disable customer reviews for this item.
Product short description
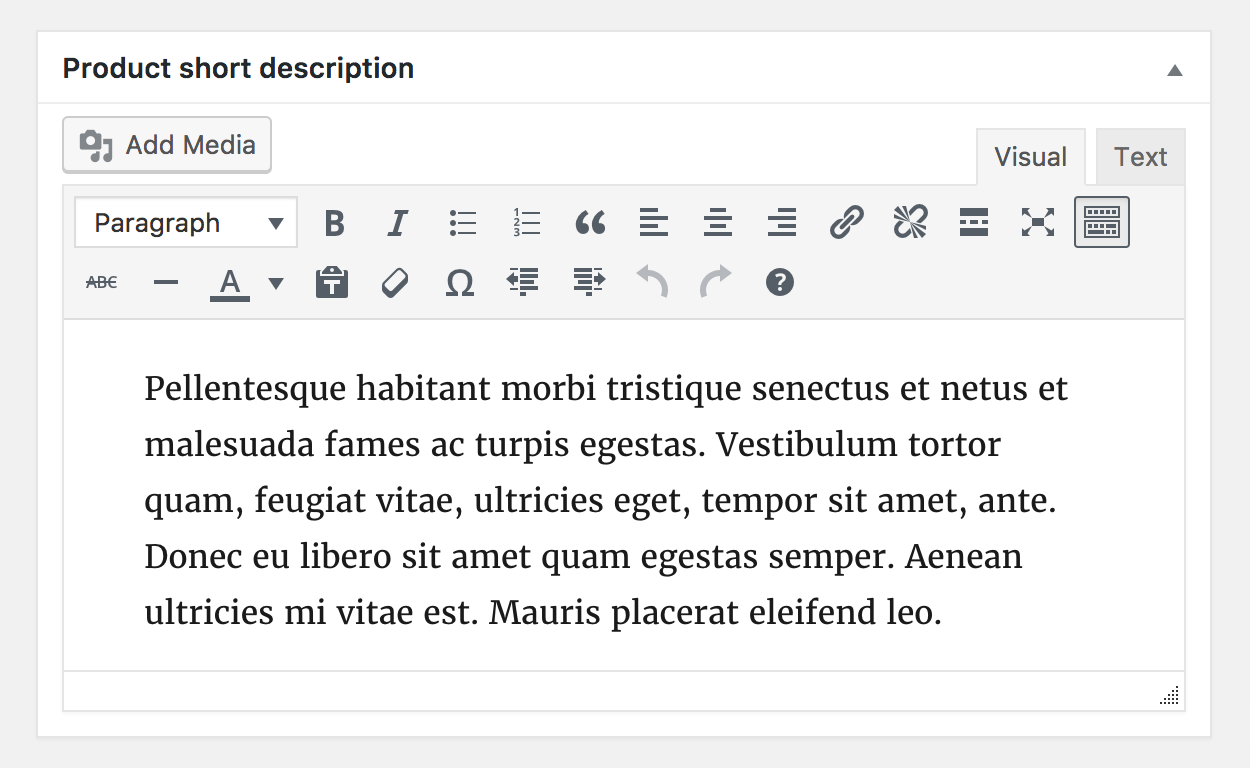
Add an excerpt. This typically appears next to product imagery on the listing page, and the long description appears in the Product Description tab.
Product images
Add a main product image and a gallery of images.
Adding a grouped product
A grouped product is created in much the same way as a Simple product. The only difference is you select Grouped from the Product Type dropdown.
Create the Grouped product
- Products > Add New.
- Enter a Title for the Grouped product, e.g., Back to School set
- Scroll down to Product Data and select Grouped from the dropdown. The price and several other fields disappear. This is normal because a Grouped Product is a collection of ‘child products’, which is where you add this information.
- Publish.
The Grouped product is still an empty group. To this Grouped product, you need to:
- Create products and add them
- Add existing child products
Having the choice to first create Simple products and add them to a Grouped product later; or first create a Grouped product and add Simple products later gives you flexibility to add Simple products to more than one Grouped product.
Add products to the Group
- Products > Add New.
- Select the Grouped product you wish to add products to.
- Scroll down to Product Data and go to Linked Products.
- Select Grouped Products, and search for the product by typing
- Click the products you wish to add.
- Update
- You can drag and drop to reorder the Grouped Products. Once you press Update, the new order will be shown on the product page.
Adding a virtual product
When adding a Simple product, you can tick the Virtual checkbox box in the product type panel.
With Variable products this checkbox is moved to each variation.
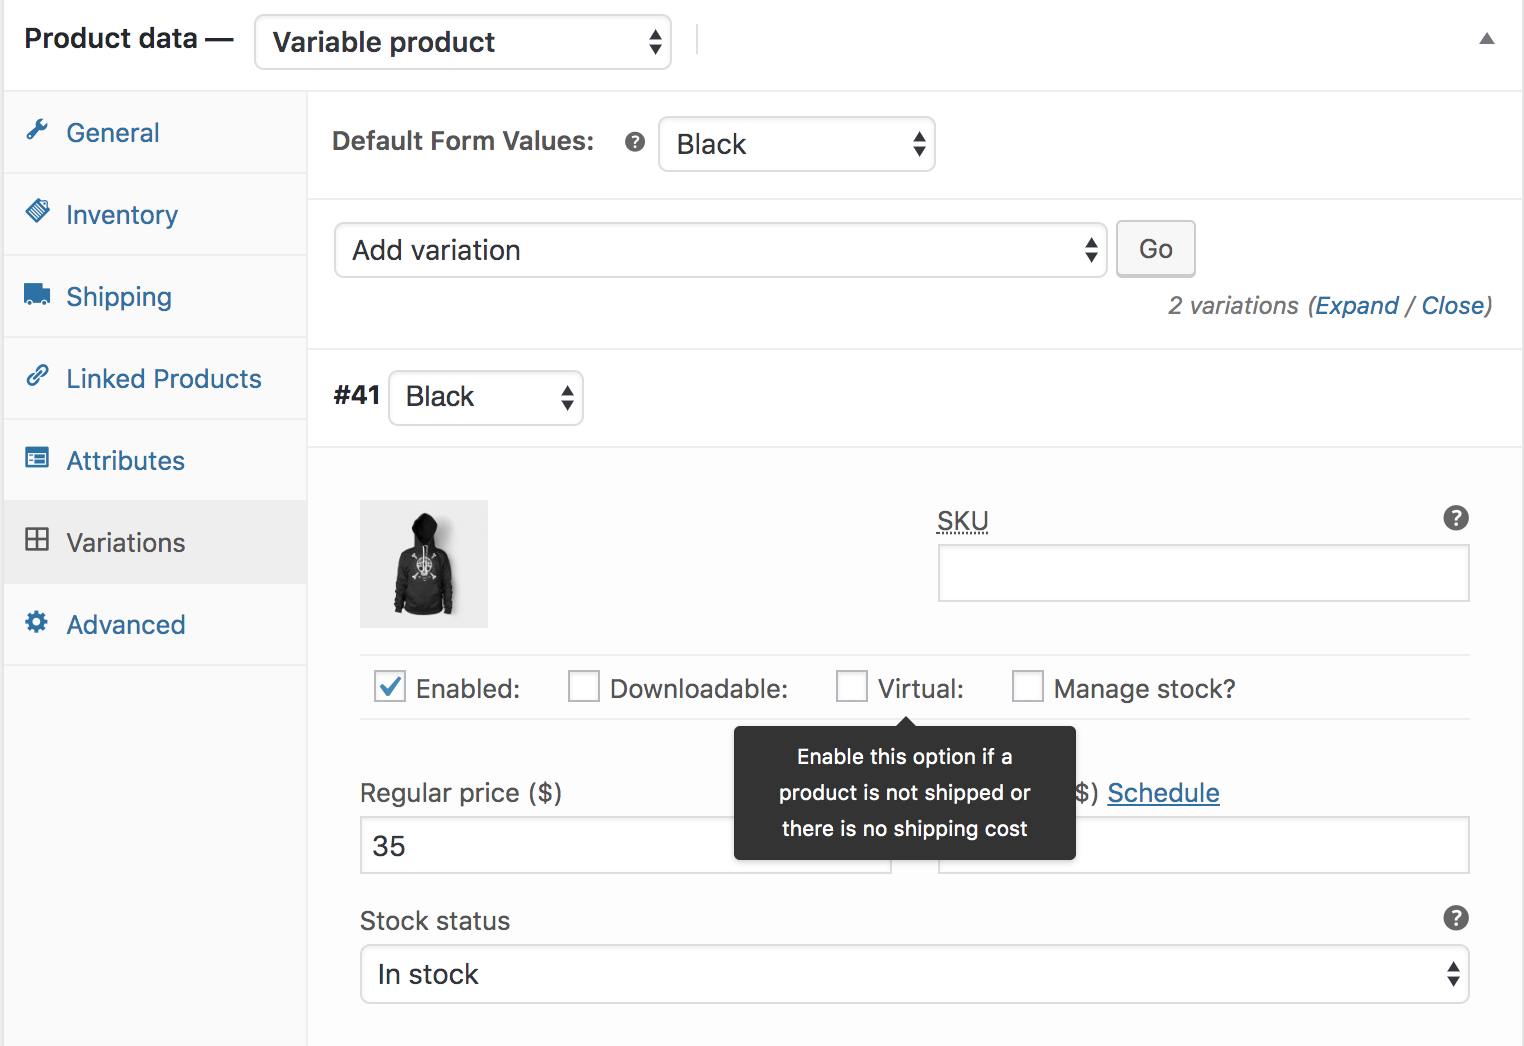
Enabling this, disables all shipping related fields such as shipping dimensions. A virtual product will also not trigger the shipping calculator in cart and checkout.
Adding a downloadable product
When adding a simple product, you can click the Downloadable checkbox box in the product type panel. This adds two new fields:
- File path — Path or url to your downloadable file.
- Download limit – Limit on number of times the customer can download file. Left blank for unlimited downloads.
For maximum flexibility, downloadable products also incur a shipping cost (if, for example, you were offering both a packaged and a downloadable version of a product, this would be ideal). You can also check the Virtual box if the downloadable product is not to be shipped.
Adding an external/affiliate product
Select ‘External/Affiliate’ from the product type dropdown. This removes unnecessary tabs, such as tax and inventory, and inserts a new product URL field. This is the destination where users can purchase the product. Rather than Add to Cart buttons, they see a Read More button directing them to this URL.
Adding a variable product
Variable products are arguably the most complex of product types. They let you define variations of a single product where each variation may have a different SKU, price or stock level.
Deleting a product
To delete a product:
- Go to: Products.
- Find the product you wish to delete.
- Hover in the area under the Product name and click Trash.
Allow Backorders
Select whether to allow Backorders from the dropdown, if you are managing stock on a product.
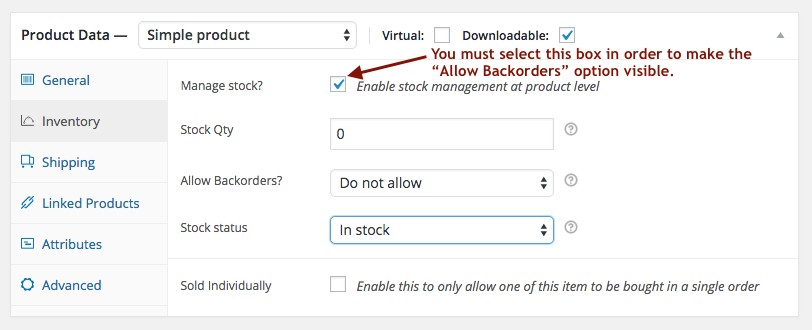
To allow backorders, the Stock status must be set to In Stock even though the Stock Quantity is 0 or less.
Many Blessings,
Your Galilee Life Family.